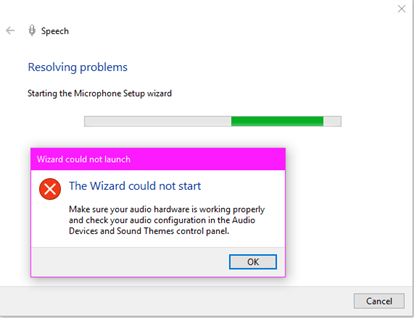
It often happens after an update that you start seeing an issue with setting up the Microphone in Windows 10 on your computer. You might not be able to set it up through Speech Recognition as the control panel shows you a message that ‘Wizard could not start microphone in Windows 10’. Likewise, you would see a description along with this message, which indicates that you need to check your audio hardware and audio configuration. This means that something is wrong in the hardware or in the drivers.
A lot of people use microphones with their computers because they increase the functionality. For example, gamers use microphones during their gameplay while Youtubers or people recording podcasts use a mic with their computers for recording themselves. No matter what you are using a mic for, it needs to be recognized by the Windows for it to work on your computer.
There are a few solutions to this problem, and they have been mentioned below. If you are willing to troubleshoot this issue, make sure that you go in the order as the solutions are explained. Hopefully, one of these solutions would be able to start the Microphone in Windows 10.
How to Fix ‘Wizard could not start microphone in Windows 10’?
This problem can occur due to many reasons. It might be due to the privacy controls on your computer, the drivers, or any other reason. Let us tackle these reasons one by one.
Solution 1: Checking the Privacy Settings
First of all, you need to check the Privacy settings. You might not even be aware of this, or you might have forgotten that you have disabled the Microphone in the Privacy settings.
- Go to the Start menu and then go to Settings.
- Click on Privacy.
- In the left pane, you will see different options. Click on Microphone.

- On the right side of the screen, swipe the toggle to turn it on.
- This will give permission to your apps to access the Microphone.
Now, try to set up the Microphone and see if it is working or not. If you still see the same error, follow the steps given in the next solution.
Solution 2: Update the Drivers
If your computer recently went through an update, you would have to update the drivers for the Microphone, too, as the Windows update might not be compatible with the old drivers. For this, you should either update the drivers or uninstall the previous ones and download the new ones.
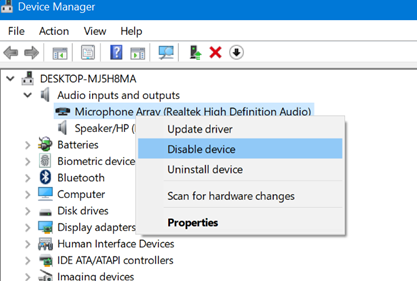
- Go to Start Menu and then search for Device Manager in the search bar.
- Click on Audio Inputs and Outputs.
- Right-click on the option for Microphone. Select Update Driver.
- The driver will start updating if an update is available.
After the update is completed, start the Microphone again and check if the error still persists. If there is no update, click on the ‘uninstall device.’ After that, restart your computer. When the computer starts again, Windows will install the best driver for the update automatically.
Solution 3: Move the Plug Position
Sometimes, there is nothing wrong with the drivers, and it is the physical connection of the Microphone that is causing the problem. Check for this by reinserting the Microphone into the jack. You might be seeing the error due to a loose connection.
Try to insert the plug into the rear jack and see if the Microphone starts then. Mostly, this should solve the issue, but if it does not, you can use other methods.
Solution 4: Set Preferred Mic as Default
If you have multiple microphones, you need to make sure that the mic you want to use is the preferred one. For example, there is a microphone in most laptops. When you connect an external mic, then Windows will not be able to identify it as the in-built mic will be considered the default.
- Go to the Start Menu and type ‘Sound’ in the search bar.
- Go to Recording and click on the mic that you prefer.
- Enable it by clicking on the enable option.
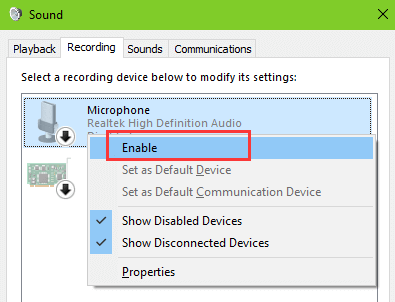
- Then, set it as default by clicking on the option at the bottom.
Now, try to start the Microphone. If the issue was due to preferences, it would be solved, and you would not see the error again.
Solution 5: Update the Sound Card Driver
It is possible that the built-in sound card of your computer is not updated. A soundcard helps in keeping communication intact between the mic and the computer. If it is not updated, you would not be able to use the mic.
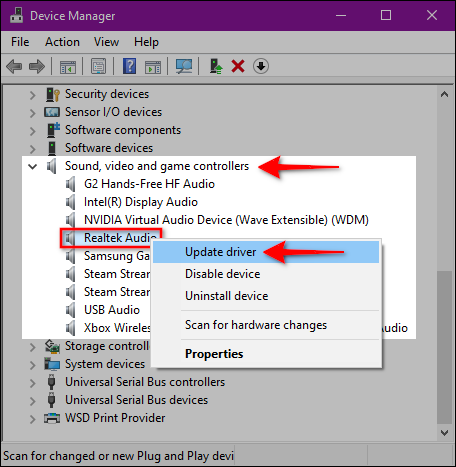
- Go to the Start Menu and search for Device Manager.
- Go to Sound, Video, and Game Controllers.
- When you see the sound driver of your choice, right-click on it and then click on Update driver.
- Click on ‘Search automatically for updated driver software.’
- Windows will search for the appropriate sound driver and download it for your computer.
To use this method, you should know which sound card you are using on your computer. If you do not know which sound card is being used, you can update all of them. One of them has to be the sound card that your computer is using, so when it is updated, the error will go away.
Other than these solutions, you should also check if your mic is working properly. There might be something wrong with the mic. It might be defected or not turned on. Make sure you check all the minor issues before you go on to implementing the bigger solutions.
Conclusion
It is quite a nuisance if you are trying to record something or play with your pals, and you see the ‘wizard could not start microphone in windows 10’ error. We have mentioned different ways to solve this problem in this guide. At times, the error might be due to hardware reasons, while sometimes, the problem resides with the drivers. We have mentioned the methods for solving all these problems. Hopefully, one of these solutions will remove the error so that you can use the mic on your Windows 10 PC.
Recent Comments