Setting up a workgroup in Windows 10 allows for decentralized resource sharing and collaboration among interconnected devices in smaller local area networks (LANs). In this guide, we’ll show you how to set up a workgroup in Windows 10, making it easy for you to share files and resources with other devices on your local network. Whether you’re new to networking or have some experience, we’ll walk you through the process step by step, from finding your current workgroup to changing its settings to fit your needs.
We’ll also explain what a Windows workgroup is and why it’s important for connecting devices together. You’ll learn how to change your Windows 10 workgroup name and customize your network settings using either the Control Panel or command-line tools like Command Prompt and PowerShell. By the end, you’ll have the knowledge and skills to make the most out of your Windows 10 network, improving collaboration and making resources more accessible for everyone.
What is Windows Workgroup?
A workgroup represents a decentralized network configuration typically found in Microsoft Windows environments. It’s essentially a cluster of computers within a local area network (LAN) that collaborate by sharing resources and duties. Unlike traditional server-based setups, a workgroup allows computers to directly communicate with each other without the need for a dedicated server.
In a workgroup setup, each computer within the network connects physically to a central router or switch. This interconnectedness enables seamless sharing of resources such as files and printers among the member computers. Moreover, each computer has the capability to contribute its own resources to the collective pool accessible to others within the workgroup.
It’s important to note that while a workgroup involves interconnected computers sharing resources, it doesn’t equate to the entire network itself. In other words, connecting a computer to the network doesn’t automatically enroll it into a specific workgroup; it can operate independently. Additionally, within a single network, it’s possible to establish multiple workgroups, each with its own set of member computers and shared resources.
How to Find the Windows 10 workgroup?
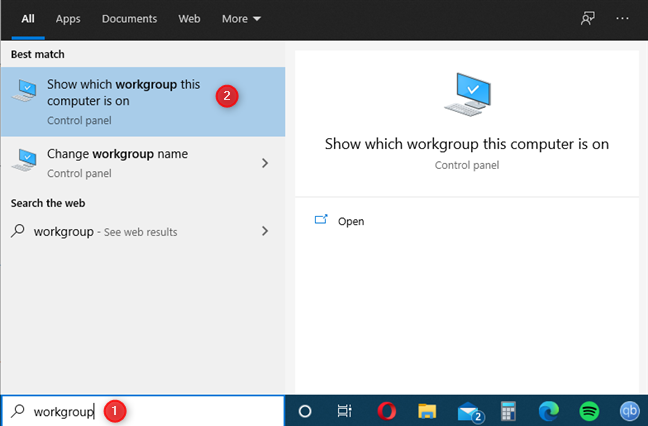
One way is to utilize the search feature on your taskbar. Simply follow these steps;
- Click or tap on the Search field located on your taskbar.
- Type “workgroup” into the search field.
- From the search results, click or tap on “Show which workgroup this computer is on.“
Using Control Panel:
For those who prefer a more traditional approach, you can navigate through the Control Panel.
- Open the Control Panel. You can do this by typing “Control Panel” into the taskbar search field and selecting it from the results.
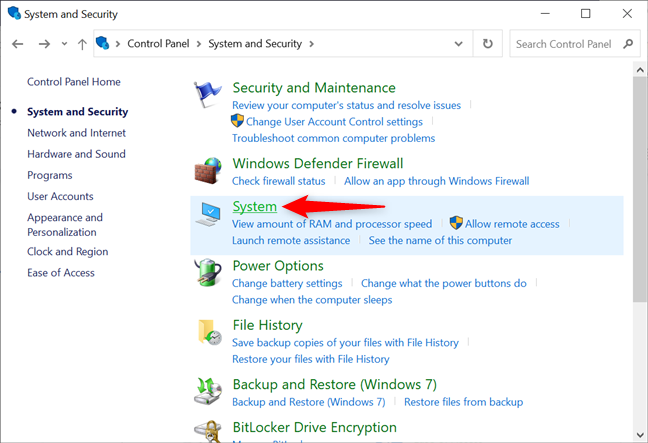
- Within the Control Panel, locate and click or tap on “System and Security.”
- Under the “System and Security” section, find and click or tap on “System.“
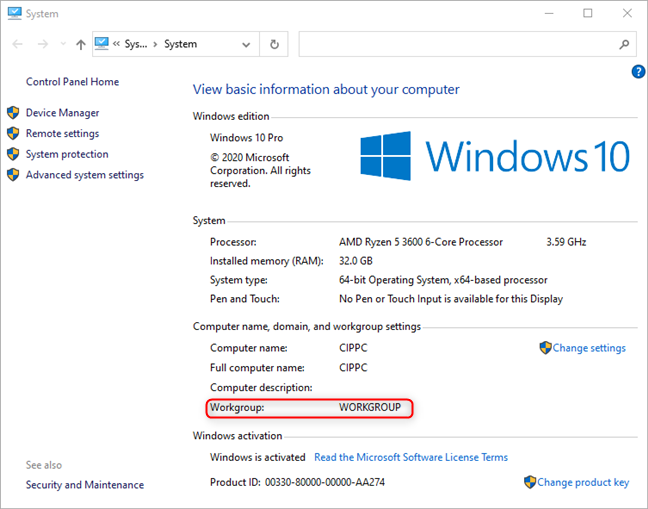
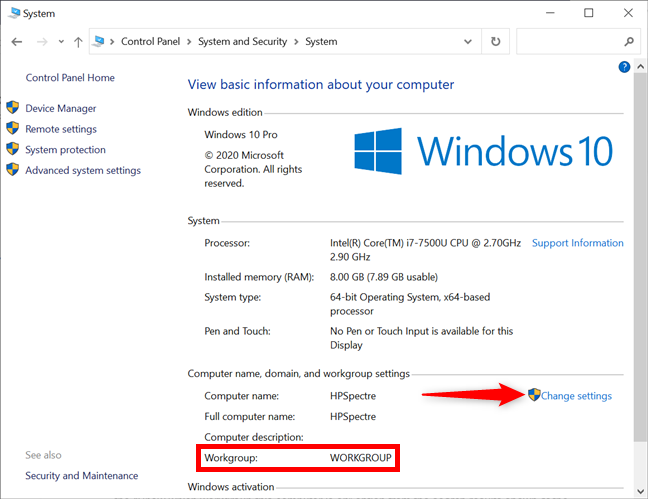
- In the “System” window, look for the section titled “View basic information about your computer.”
- Within this section, you’ll see “Computer name, domain, and workgroup settings.“
- The Windows 10 workgroup of your device is displayed next to the “Workgroup” entry.
So whether you use modern shortcuts or prefer sticking to the traditional methods, you can easily discover which workgroup your Windows 10 computer is a part of!
How to Change Windows 10 workgroup From System Properties?
Here’s a step-by-step guide on how to change the workgroup in Windows 10:
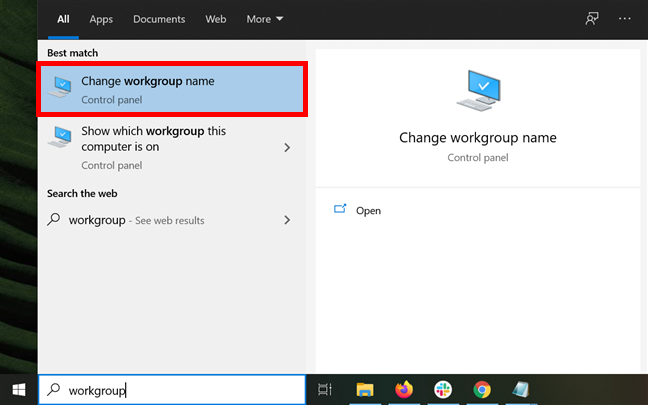
- Open the Start menu and type “workgroup” in the taskbar’s Search bar. Then, click or tap on “Change workgroup name”.
- Alternatively: You can use the Control Panel. Open the Control Panel, navigate to “System and Security” and then click on “System“. On the left-hand side, select “Advanced system settings“. In the System Properties window, under the “Computer Name” tab, click on “Change“.
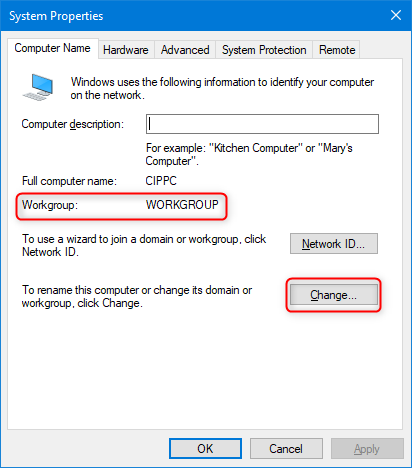
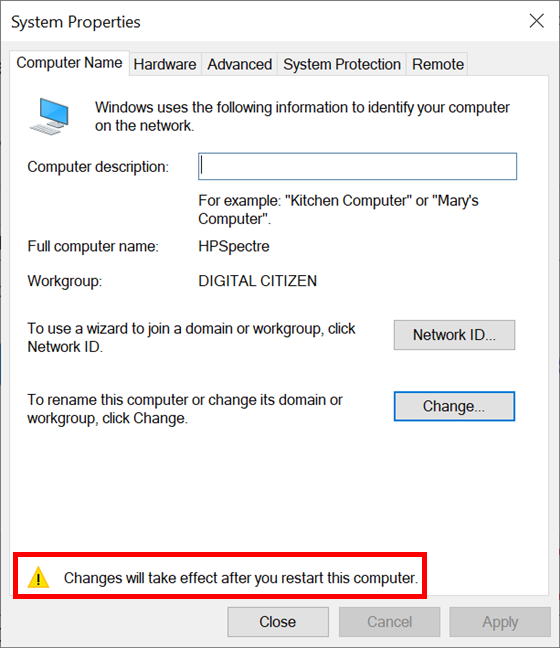
- Regardless of the method you chose, you’ll end up in the System Properties window. Here, you’ll find your current Windows 10 workgroup under the Computer Name tab.
- To change the workgroup, click or tap on “Change“. This opens the “Computer Name/Domain Changes” window.
- In the “Computer Name/Domain Changes” window, you’ll see the Workgroup field at the bottom. Type the name of the workgroup you want to join instead of the default one.
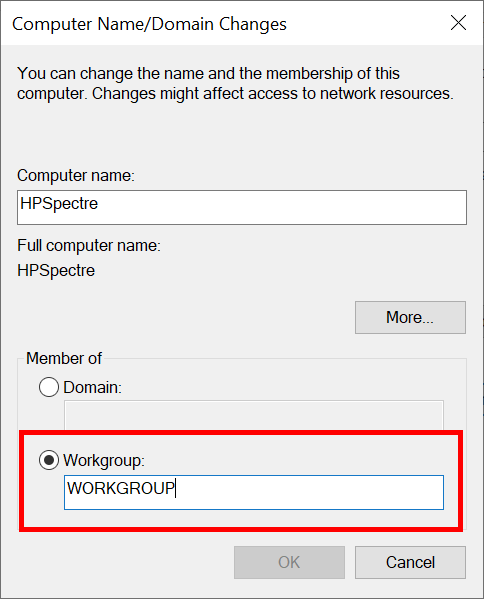
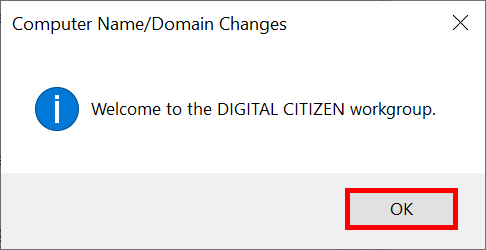
- After typing the new workgroup name, click or tap OK. You may see a pop-up welcoming you to the new workgroup.
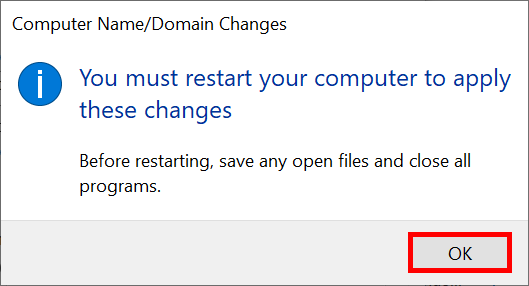
- Another pop-up will inform you that your device needs a restart for the changes to take effect. Press OK.
- After pressing OK, you’ll be returned to the System Properties window. Close it by clicking or tapping Close.
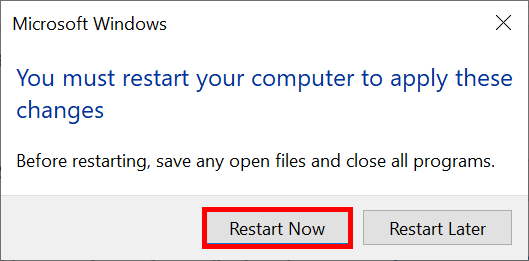
- Windows will prompt you to restart your computer. Save your work and close any open apps or files, then click or tap Restart Now.
- After the restart, your computer will join the new workgroup. Now, it can interact with other computers and devices that are part of the same workgroup.
How to Change Windows 10 workgroup From Command Prompt?
For those who favor the simplicity and control of a command-line interface, altering the workgroup settings in Windows 10 can be achieved swiftly. By accessing the Command Prompt with administrator privileges, you can execute a command that streamlines the process.
Here’s the step-by-step guide:
- To begin, ensure you’re in an elevated Command Prompt session. You can do this by right-clicking on the Start menu icon, selecting “Command Prompt (Admin)” or “Windows Terminal (Admin),” depending on your Windows version.
- Once in the Command Prompt window, type or paste the following command:
“wmic computersystem where name=”%computername%” call joindomainorworkgroup name=”Workgroup_Name”.
Replace “Workgroup_Name” with the desired name for your workgroup. This command initiates the process of joining or creating a new workgroup, seamlessly integrating the changes.

- After entering the command, press Enter to execute it. You’ll notice the system processing the request. Once completed, the specified workgroup name will replace the existing one.
- Close the Command Prompt window. It’s essential to restart your computer for the changes to take effect fully. A reboot ensures that all system components recognize and apply the newly configured workgroup settings.
How to Change Windows 10 Workgroup From PowerShell?
If you like using PowerShell, you can use it to change the workgroup on your Windows 10 computer. Here’s how:
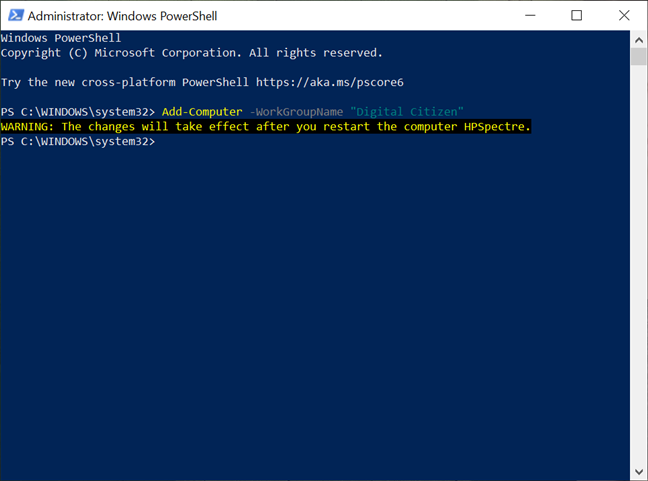
- Open PowerShell as an administrator.
- Type in this command: Add-Computer -WorkGroupName “Workgroup_Name“
Remember to replace “Workgroup_Name” with the name of the workgroup you want to join or create.
How to Share Files and Folders in a Workgroup?
Sharing files and folders within a workgroup is essential for collaboration and easy access to resources. Here’s a step-by-step guide on how to do i
- Right-click on “Files.”
- Select “Properties” from the dropdown menu.
- In the Properties window, click on the “Sharing” tab.
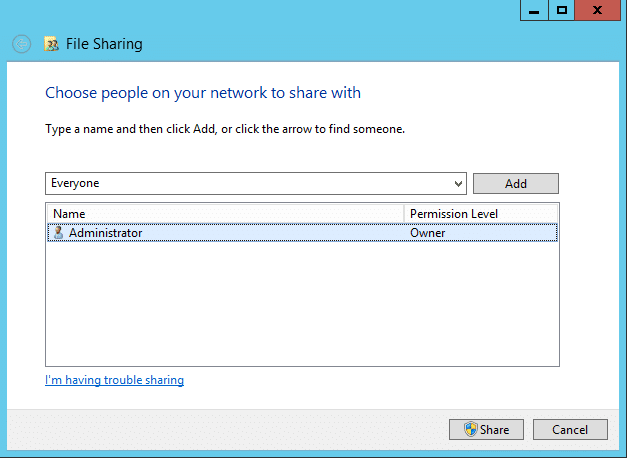
- Click on the “Share” button.
- A new window will appear. Here, you can choose the people you want to share the folder with.
- Select the permission level for each user you are sharing the folder with.
- To grant access to other users, you’ll need to create their usernames and passwords on your computer.
- This is essential for authentication purposes, ensuring only authorized users can access the shared folder.
Difference Between Workgroup and Domain
Computers connected within a network can fall into two categories: workgroup or domain, each influencing how network resources are managed. Workgroups typically represent smaller, peer-to-peer local area networks. In this setup, every computer operates under its own set of rules and configurations, overseen by the respective device’s administrator. Each computer within a workgroup also possesses a distinct name. For seamless resource sharing among computers within the same network, it’s essential for all involved computers to belong to the same workgroup. As security is managed independently by each computer in a workgroup, users may opt for creating user accounts on the target computer they wish to access. Alternatively, users can configure their devices to share resources openly with everyone within their workgroup.
On the other hand, domains are integral to larger networks encompassing a variety of devices like servers, desktop computers, laptops, and network printers, among others. Within a domain network, centralized management and configuration tasks are undertaken by network administrator(s). All computers and devices within a domain adhere to a uniform set of rules and configurations. Accessing computers within a domain doesn’t necessitate having a user account predefined on each individual computer. Instead, users are provided with a domain user account by the network administrator, enabling them to log into any computer within the domain using the same credentials. Domains are typically deployed in enterprise-level networks, offering efficient management capabilities. In contrast, smaller-scale networks such as those found in homes, schools, or small businesses can function effectively using a workgroup model.
As we have informed you about workgroups and domains, it is also worth mentioning homegroups here. Microsoft created HomeGroups for Windows 7 to make it easier for people to share files and printers among their computers at home. With HomeGroups, you don’t need to manually set up shared accounts on each computer. Instead, you use one shared login for managing security settings. HomeGroup also encrypted communication, making it safer to share files. It’s important to note that joining a HomeGroup doesn’t mean you leave your regular Windows workgroup, they can work together. But, if you have older versions of Windows, like ones before Windows 7, they can’t join HomeGroups.
Why Workgroups Are Not Suitable For Larger Work Environments?
In larger work environments, workgroups face significant challenges due to their inherent limitations. Here are two primary reasons why workgroups may not be suitable for such settings:
- Workgroups struggle to cope with the demands of larger networks. While they might function adequately in small-scale setups, they quickly become unwieldy as the number of computers increases. Imagine the complexity of managing user accounts in a network with over 15 computers, let alone in a corporation housing thousands of machines. Creating and managing usernames and passwords individually on each computer becomes a monumental task, consuming valuable time and resources. Consequently, the administrative burden becomes overwhelming, making efficient management nearly impossible.
- Workgroups lack a mechanism for automatic password synchronization across networked computers. This deficiency becomes glaringly apparent when users change their passwords on their own machines. In such cases, the updated credentials fail to propagate to other computers within the workgroup. Consequently, users encounter inconvenience and frustration when attempting to access resources on different machines, as they are compelled to recall and input their old credentials repeatedly. This manual synchronization process not only undermines user experience but also introduces security risks, as outdated credentials might inadvertently grant unauthorized access.
Bottom Line
setting up a workgroup in Windows 10 offers a decentralized network configuration ideal for smaller local area networks. Through easy steps accessible via System Properties, Command Prompt, or PowerShell, users can establish and manage workgroups effortlessly. This guide not only outlines the process of creating and changing workgroups but also emphasizes the significance of file and folder sharing within these networks. While workgroups serve well in smaller environments, the comparison drawn between workgroups and domains underscores the importance of choosing the right network configuration based on the scale and management needs of the environment. Whether through traditional methods or command-line interfaces, the ability to seamlessly establish and maintain workgroups in Windows 10 enhances collaborative efforts and resource sharing among interconnected devices. That’s all for today. If you like this article, share it with your family and friends.
Recent Comments