Minecraft is an awesome interactive game that you can sit and play for hours. It transports you into another world that you can build and discover. However, sometimes, you might be faced with a memory issue in the game.
There is no need to worry as you can increase the RAM allocated to Minecraft. This will help in solving the memory issue. You should not allocate too much of the RAM to the game. Less than two-thirds is quite fine but if you go over it, you might be causing issues for other programs.
How to Increase RAM on Minecraft Server?
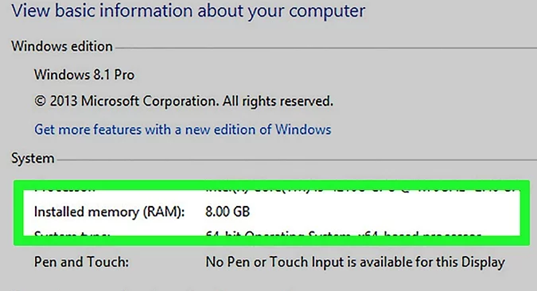
There are different ways to give Minecraft more memory. One of the ways to do this is by using a Minecraft server. For this, you will need to see the basic information of your computer first. The amount of RAM on your computer will indicate how much of it you can allocate to Minecraft.
- Go to the Start Menu and then to Settings.
- Click on System and then About.
- You will see all the information about your computer. Look for the amount of RAM available.
- If you are using a Mac, go to the Apple menu and click on About this Mac. You will see the RAM here in front of the ‘Memory’ tag.
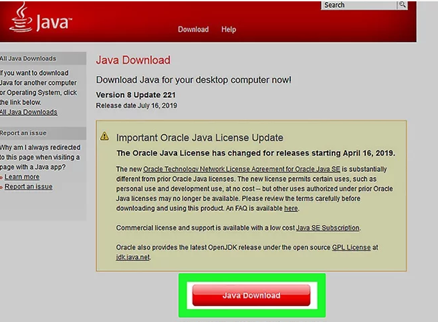
- The next step is to update the Java program. For this, go to Java’s website and download the latest version. Now, you can allocate RAM.
- If you are using a Windows 32-bit computer, you can only give 1 GB of RAM.
- After you have downloaded the latest version, go to the Minecraft Server directory. This is where the Minecraft server files are.
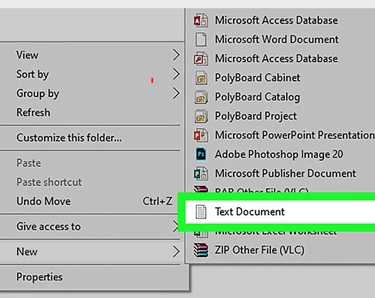
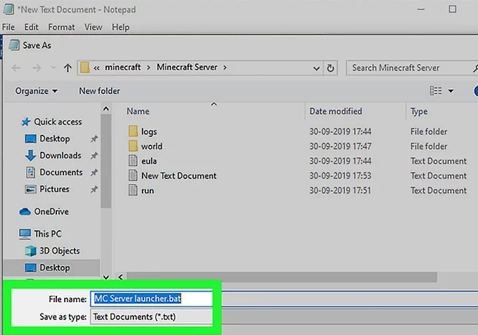
- In the server folder, make a text document.
- If you are using Windows, click Home. For Mac, click on File and then click on New/New Item. Select the Text Document to create a new one. This document will be in the same location as the Minecraft server.
- Now, you have to enter the code for allocating more RAM to Minecraft. This is different for different operating systems.
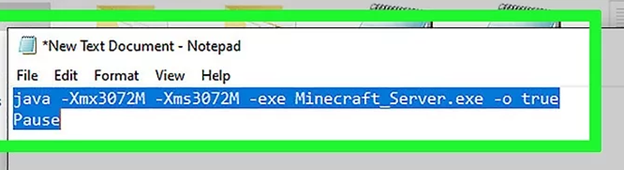
- If you are using Windows, enter:
java -Xmx####M -Xms####M -exe Minecraft_Server.exe -o true
PAUSE
- If you are using OS X, enter:
#!/bin/bash
cd “$( dirname “$0″ )”
java -Xms####M -Xmx####M -exe Minecraft_Server.exe -o true
- When you have copied this to the text document, write the megabytes you want to give to Minecraft in place of ####.
- For example, if you want to give it 2 GB, enter 2048, and if you want to give it 3 GB, type in 3072. For 4 GB, type in 4096, and for 5 GB, type in 5120.
- After you have changed the value, save the file. For Windows, save this file as a ‘bat’ file. When you are saving it, click on Save as and then change the .txt extension to .bat. For OS X, change this to .command. Then, save the file.
- After this, click on this file and run it to start Minecraft. This is now the new launcher for Minecraft.

When you launch the game using this file, extra RAM will be allocated to Minecraft.
How to Increase Memory for Minecraft Using Launcher Version 2.0?
When you are playing the game and you come across the error “the game crashed whilst initializing game Error: java.lang.outofmemoryerror: java heap space’’, you should know that you need to allocate more RAM to Minecraft. You can do this by using the Launcher Version 2.0X. To use this method, you need to follow the first two steps of the previous method. Once you have downloaded the latest version of Java, you can start following these steps.
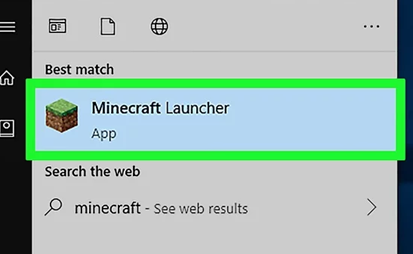
- Double-click on the Minecraft icon. This will open the Launcher.
- Look at the value on the bottom corner of the Launcher. If the value is 1.6, then you can use the next method. If the value is 2.0, then use this method.
- On the top bar of the launcher, you will see the Installations tab. Click on it.
- Turn on the Advanced Settings switch if it is not already on. You will find this switch on the top-right corner of the Launch Options page. This switch should be green. This means it is on.
- Then, look for the profile you have to change and click on it. If you only see one profile, just click on that.
- Enable JVM arguments. There will be a text box named JVM arguments.
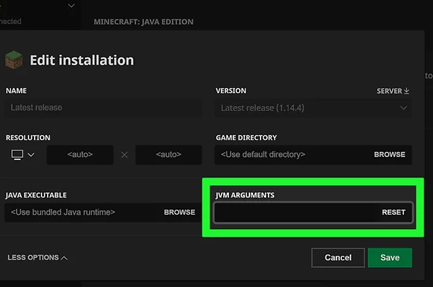
- Now, you have to change the text in this box. The default value will be –Xmx1G.
- You can change it according to the amount of RAM you want to allocate to Minecraft. Change the 1 to any value you want. For example, if you want to allocate 2 GB of RAM to Minecraft, change this value to –Xmx2G.
- Click on Save to confirm the settings.

The Launcher has made it very easy for you to change the RAM allocated to Minecraft. You no longer have to use the text document method if you have the Launcher 2.0.
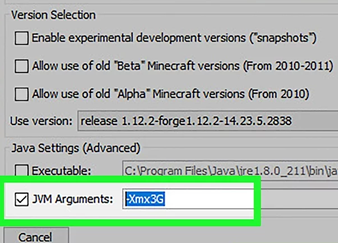
How to Give Minecraft More Memory using Launcher 1.6X?
If you are using the 1.6X Launcher for the game, you can allocate more RAM by a slightly different method than the one used for Launcher 2.0X. The initial steps will be the same. Start the Minecraft 1.6X Launcher and then follow the given steps:
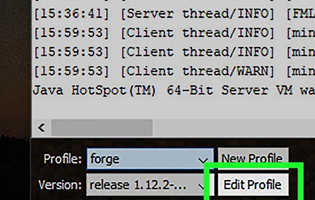
- Click on your profile and then click on Edit profile.
- Go to Java Settings (Advanced) and then check the JVM Arguments box to enable JVM. Now, you will be able to modify the program by entering commands.
- Do the same thing as mentioned above. Allocate the RAM to Minecraft by changing the value accordingly.
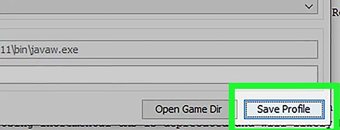
- After you have changed the value, Save the Profile and start playing the game.
Conclusion
Hopefully, you will have learned how to give Minecraft more memory and play without any issues. Even though the first method was the most-used one, you can now change the settings using the Launcher. It takes about a few minutes for you to change the settings and start playing the game without any memory constraints.
Recent Comments